Image of frozen peas, carrots, and corn.

How to Use Up Vegetables in Soup Mix Freezer Bags

We’ve all been there… We’ve all had the best intentions of meal prepping or eating healthier and then either never started or only used half the veggies we bought. The rest sat in the refrigerator until they were either going bad or were beyond the point of saving, and we had to throw them out. Well, I have the perfect solution for how to use up veggies that will not only save time later but will help you eat healthier too!

Soup Mix Bags

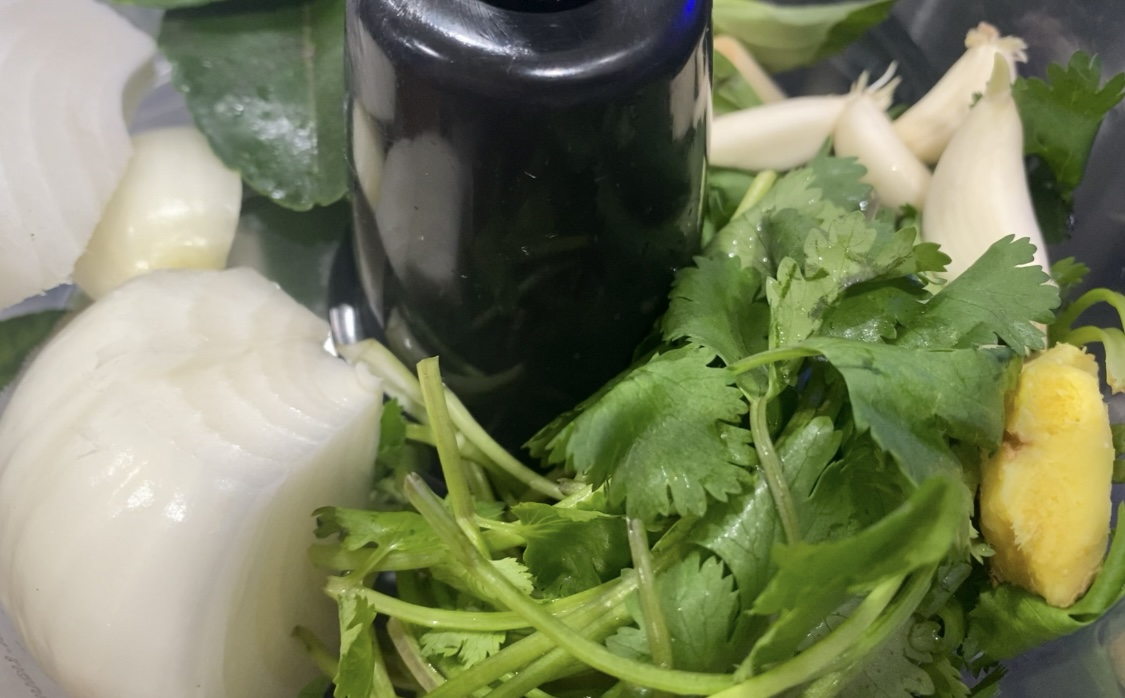
When my celery is starting to wilt and my mushrooms have been sitting in the refrigerator way too long, I gather all of the vegetables in my refrigerator, take out my food processor, and get to work making soup mix bags! It only takes a few minutes, and then I have bags of vegetables ready to pull out of the freezer any time I’m hungry for soup. If you don’t have a food processor, you can cut your vegetables by hand. It will just take a little longer.

What Vegetables Work?

The great news is that these soup mix bags are customizable to what you like to eat in your soup and what you happen to have in your refrigerator! My favorite combination just contains the staples I use in almost every soup I make–carrots, celery, bell peppers, onion, garlic, and mushrooms. If you want the recipe for my “chicken” noodle soup, check out this post! It uses tofu for a vegetarian/vegan option.

Below is a comprehensive list of vegetables that freeze well and that you could include in your soup mix bags:

  • Carrots
  • Celery
  • Bell peppers
  • Onions
  • Mushrooms
  • Corn
  • Broccoli
  • Zucchini
  • Green beans

Vegetables With Special Preparation

Mushrooms will need to be fully cooked before freezing, while zucchini and green beans will all need to be blanched.

Instructions

  1. Wash all vegetables and peel the vegetables that need peeled.
  2. If any vegetables require special preparation, like pre-cooking or blanching, complete that preparation and set the vegetables aside to cool.
  3. Using a food processor with the slicing plate attached, slice the remaining vegetables you would like to use in your soup mix bags.
  4. Evenly divide the vegetables into reusable sandwich bags.
  5. Store in freezer for 4-6 months.
  6. When you’re ready to cook, simply take bag out of freezer and dump vegetables into hot pan.
  7. Allow to thaw and then cook to desired doneness.
  8. Continue with soup recipe.

Sweet Potato Green Curry – Autoimmune Protocol Friendly, Vegan

This sweet potato green curry is hearty, vegan, and AIP-approved! The curry paste takes a little extra effort since it is made from scratch, but the rest of the recipe is a breeze!

I wouldn’t classify this as “Thai” curry. As a person with Okinawan roots, I’m not super familiar with Thai food, but I am aware that Thai green curry is spicier than this curry. But, if you’re on AIP, then you know peppers aren’t elimination-phase approved, so I went with a sweeter curry instead!

I think this would be really delicious served over sweet potato noodles, which are AIP-friendly as well! These are my favorite and can be found on Amazon. If you aren’t vegan, you can add your protein of choice, and, if you aren’t AIP, you can add tofu!

Where can I get special ingredients?

Certain ingredients, like lime leaves and Thai basil, may not be available in your typical grocery store. Even where I’m located in the south (i.e., not surrounded by a very diverse population), I was able to find all of these ingredients at our local Asian food store.

What can I do with lime leaves?

Aside from this curry, you can use lime leaves to flavor dishes you would typically have limes with, like guacamole! In the meantime, you can easily store lime leaves in the freezer to keep them fresh until you’re ready to use them.

Recipe

[recipe title="Sweet Potato Green Curry" servings="6" preptime="20 minutes" cooktime="25 minutes" ]

[recipe-ingredients]

* 1 stalk lemongrass

* 1 handful cilantro

* 1 handful Thai basil

* 3-4 lime leaves

* 2 Tbsp ginger, minced

* 1/2 onion, chopped

* 4-6 cloves garlic, minced

* 1 tsp coconut oil

* 3 sweet potatoes, cubed

* 1/2 onion, diced

* 6-8 leaves swiss chard, stems removed and saved

* 6-8 swiss chard stems, sliced

* 2-3 carrots, sliced

* 1 1/2 cups mushrooms, sliced

* 1 can coconut milk

* 1 can coconut cream

* Coconut aminos to taste

[/recipe-ingredients]
[recipe-directions]

1. To make the curry paste, process lemongrass, cilantro, Thai basil, lime leaves, ginger, onion, and garlic in a food processor until smooth.

2. Set your Instant Pot to sauté and add coconut oil.
2. Once hot, add onion, chard stems, and carrot. Cook until just softened, then add in curry paste. Cook until fragrant.

3. Add in mushrooms and cook until they begin to cook down.

4. Add potatoes to Instant Pot and add water until all vegetables are just covered.

5. Turn Instant Pot valve to sealing and pressure cook for 3 minutes.

6. When Instant Pot has finished pressure cooking, turn valve to venting.

7. Remove lid and add coconut cream, coconut milk, swiss chard, and coconut aminos to taste.

8. Serve while hot!

[/recipe-directions]
[recipe-nutrition]
Nutritional information will vary depending on the vegetables used.
[/recipe-nutrition]
[/recipe]

This post may contain affiliate links. As an Amazon Associate, I earn from qualifying purchases.

The BEST No-Mato Sauce – Autoimmune Protocol (AIP) Friendly

I absolutely love tomatoes. I use some variation of tomato in nearly everything I cook. I eat them by themselves. I just really love them. When I started the Autoimmune Protocol, I was not happy to see tomatoes weren’t on the list of approved foods. Upon searching for no-mato sauces, I just knew there was no way the conglomeration of vegetables people were blending together would taste like tomatoes. So I did a lot of research and came up with my own recipe!

Let. Me. Tell. You. It fooled me and my fiancé! It is really that good! Even though there are a million no-mato sauce recipes out there, I just have to share mine because it has the acidity, the sweetness, and all of the tomato-y goodness…without the tomatoes, sugar, or non-AIP-approved foods!

What Makes Your Recipe Different?

There were two important factors to me when making this recipe. First, it had to have the unmistakable acidity of a real tomato sauce. And, second, it had to look like tomato sauce. Visuals and aesthetics are important to me, especially when it comes to food, and I just couldn’t eat something that looked like…well…not appetizing. I think my recipe satisfies both requirements. I hope you’ll try it and see for yourself!

Quick Note

I batch-prep this recipe because it is so delicious and freeze whatever portion I don’t plan to use within 3-4 days. If you want to just test the recipe out, I would suggest at least halving it because it does make quite a few servings.

Recipe

[recipe title="The BEST No-Mato Sauce" servings="20" preptime="15 minutes" cooktime="15 minutes" ]

[recipe-ingredients]

* 1 1/2 yellow onion, chopped

* 9 carrots, sliced

* 9 celery stalks, sliced

* 1 beet, cubed

* 1 cup cranberries, frozen or canned

* 3/4 cup cherries without the pit, frozen or canned

* 6 cloves garlic

* 1 can pumpkin purée

* 1 Tbsp Italian seasoning

* 1-2 tsp sea salt

* 4-6 cups bone or veggie broth, enough to cover fruit and vegetables

[/recipe-ingredients]
[recipe-directions]

1. Cut all vegetables.

2. Set Instant Pot to sauté and add onion. I use water or veggie broth to prevent sticking, but feel free to use oil if you prefer.

3. When onions begin to turn translucent, add carrots and celery. Cook until they begin to soften.

4. Add all other ingredients to Instant Pot.

5. Put the lid on Instant Pot, turn valve to sealing, and set Instant Pot to pressure cook for 15 minutes.

6. When the Instant Pot is finished pressure cooking, turn valve to venting and release steam. Remove lid.

7. If you don’t want your sauce super runny, dump off some of the broth. I left about 3 cups of broth in the Instant Pot.

8. Then, using an immersion blender, blend the vegetables until the dish becomes a marinara-like texture. You can use a blender if you’d like.

9. Season to taste. Use within 4 days or freeze.

[/recipe-directions]

Sweet Potato Noodles with Stir-Fried Vegetables (Japchae) – AIP Friendly

This recipe with sweet potato noodles and stir-friend vegetables is so good! I’ve been struggling to find meals I actually look forward to eating, but this one is my favorite so far!

It is so easy to make and very versatile. You can use whatever veggies you have on hand! I think bean sprouts, julienned carrots, and Napa cabbage would be great additions or alternatives!

Where Can I Buy Sweet Potato Noodles?

I found sweet potato noodles at my local Asian market, but you can find a really great deal on Amazon. Here’s a three-pack for the price I paid for one!

Recipe

[recipe title="Sweet Potato Noodles with Stir-Fried Vegetables" servings="2" preptime="10 minutes" cooktime="12 minutes" ]

[recipe-ingredients]

* 1 tsp coconut oil

* 6-8 ounces sweet potato noodles

* 1 1/2 cups mushrooms, sliced

* 1/4 green cabbage, sliced thinly

* 1/2 onion, sliced thinly

* 4-6 cloves garlic, minced

* 2 tsp ginger, minced

* Coconut aminos, to taste

* Sea salt to taste

[/recipe-ingredients]
[recipe-directions]

1. Cook sweet potato noodles according to directions on the package. After noodles have cooked, rinse under cool water and add a drizzle of coconut or olive oil to prevent sticking.

2. While water is heating and noodles are cooking, cut all vegetables.

3. In a saucepan or wok, add coconut oil.

4. Once coconut oil is hot, add mushrooms and onions. Sauté until mushrooms are softening and onion is nearly translucent.

5. Add in cabbage, ginger, and garlic. Sauté until cabbage has softened and garlic is fragrant.

6. Add in noodles and stir fry until mixed well and until noodles are hot.

7. Add coconut aminos and sea salt to taste.

8. Serve while hot!

[/recipe-directions]
[recipe-nutrition]
Per Serving: 498 calories; 10.6 g fat; 103.6 g carbohydrates; 2.8 g protein. Macros will vary depending on the vegetables and the noodles used.
[/recipe-nutrition]
[/recipe]

Picture of No-Tato Soup

No-Tato Soup – Instant Pot, Autoimmune Protocol Friendly

This No-Tato Soup is perfect if you’re craving potato soup, but are either on a lower carb diet or in the elimination phase of the Autoimmune Protocol (AIP). This version turned out a little sweeter than I’m used to. Next time, I’ll experiment with using less parsnips and more turnips. I might even add a rutabaga! I’ll update the recipe accordingly.

[recipe title="No-Tato Soup" servings="6" preptime="15 minutes" cooktime="12 minutes" ]
[recipe-notes]
Inspired by my local Mediterranean and Moroccan restaurant!
[/recipe-notes]
[recipe-ingredients]

* 1 tsp coconut oil

* 1 yellow onion, diced

* 4-6 cloves of garlic

* 4 turnips, cubed

* 3 parsnips, cubed

* 4 carrots, sliced and halved

* 4 celery stalks, sliced

* 6 cups vegetable broth

* 1-2 cups canned coconut milk

* Sea salt to taste

[/recipe-ingredients]
[recipe-directions]

1. First, cut all vegetables.

2. Set Instant Pot to sauté, add coconut oil and onion.

3. When onion is translucent, add garlic. Stir until garlic is fragrant.

4. Add all remaining vegetables.

5. Add vegetable broth. Season to taste.

6. Put lid on Instant Pot, set valve to sealing, and pressure cook for 12 minutes.

7. When the Instant Pot has finished pressure cooking, release steam.

8. Stir in coconut milk. Season to taste and serve.

[/recipe-directions]
[recipe-nutrition]
Per Serving: 227 calories; 14 g fat; 20 g carbohydrates; 5 g protein.
[/recipe-nutrition]
[/recipe]

Easy Red Lentil and Bulgur Wheat Soup

This red lentil soup has a secret ingredient that becomes the star of the show: bulgur wheat! Bulgur comes from cracked whole-grain kernels of wheat that get parboiled and dried before packaging!

This recipe is not gluten-free because of the bulgur, so, if you are gluten-free, I bet red lentil soup on its own would taste delicious!

Recipe Video

https://www.instagram.com/reel/ChIlRK6AE8t/?utm_source=ig_web_copy_link
[recipe title="Red Lentil and Bulgur Wheat Soup" servings="6" preptime="10 minutes" cooktime="30 minutes" ]
[recipe-notes]
Inspired by my local Mediterranean and Moroccan restaurant!
[/recipe-notes]
[recipe-ingredients]

* 3 carrots, shredded

* 5 celery stalks, shredded

* 1 yellow onion, shredded

* 2 cups red lentils

* 1 cup bulgar wheat

* 8 cups vegetable broth/water with vegetable bouillon

* 1/2 cup hot sauce

* 2 Tbsp tomato paste

* 1 Tbsp chili powder

* 2 tsp paprika

* 2 tsp cumin

* 1 tsp Trader Joe’s Mushroom & Company Multipurpose Umami Seasoning Blend (optional)

[/recipe-ingredients]
[recipe-directions]

1. First, shred carrots, celery stalks, and onion. I used a food processor.

2. Add to large pot and cook until onions are translucent.

3. Rinse red lentils and bulgar wheat, then add to pot. Cook for 2-4 minutes.

4. Add vegetable broth, hot sauce, tomato paste, and seasonings.

5. Bring to a boil and boil for 30 minutes. Add more broth/water if needed.

6. Season to taste and enjoy!

[/recipe-directions]
[recipe-nutrition]
Per Serving: 259 calories; 1.5 g fat; 45.6 g carbohydrates; 18.9 g protein.
[/recipe-nutrition]
[/recipe]

Work Week Lunch – Easy “Egg” Salad

This easy “egg” salad is perfect for a work week lunch! I make a huge batch on Sundays, take it into work on Monday, and I don’t have dishes to bring home until Friday. The star ingredient is one of the most versatile foods (in my humble opinion): tofu.

Tofu takes on the flavor of whatever is used to season it, and, for this dish, you have to purchase black salt. Okay, you don’t have to, but I highly recommend it because it’s what gives the dish an egg-y flavor!

This is delicious and high in protein too! If you liked egg salad prior to following a plant-based diet, you’ll love this recipe!

Where Can I Purchase Black Salt?

You can purchase black salt on Amazon here! This is the only brand I’ve tried and I can confirm that it is delicious and fresh!

What Bagels Do You Recommend?

I have been loving Western Bagels Perfect 10 lately! One bagel has only 140 calories and 19 grams of protein! You can purchase them here!

[recipe title="Tofu "Egg" Salad" servings="3" preptime="20 minutes" cooktime="0 minutes" ]

[recipe-ingredients]

* 1 block firm tofu, pressed

* 6 Tbsp vegan mayo

* 3 tsp yellow mustard

* 4 tsp dill pickle juice

* 2 tsp dill pickle relish

* 1/4 tsp paprika

* 3 tsp black salt, can use table salt, but I highly recommend using black salt

* 1 tsp back pepper

[/recipe-ingredients]
[recipe-directions]

1. Mix all ingredients, except tofu, in mixing bowl until well combined.

2. Add pressed tofu.

3. Use potato masher to mash tofu until crumbly.

4. Use a spoon to ensure the mixture is well combined.

5. Refrigerate overnight.

6. Serve on toast, a bagel, or crackers!

[/recipe-directions]
[recipe-nutrition]
Per Serving: 352 calories; 26.7 g fat; 10.8 g carbohydrates;
23.4 g protein.
*Macros will vary depending on tofu and vegan mayo brands.
[/recipe-nutrition]
[/recipe]

Vegan Pancit

Easy Pancit – Vegan

The second recipe I’m sharing for Asian American and Pacific Islander Heritage Month is this easy vegan pancit! This recipe is extra special because it’s a recipe from my Auntie Fe–my biological aunt who found my mom and me when I was seventeen years old! Before meeting my biological family, I didn’t know much about my Filipina roots, and pancit was the first meal my Auntie Fe made for us!

What Kind of Noodles Should I Use? Where Can I Find Them?

There are many types of pancit, but my family uses the Buddha Brand Rice Stick noodles, which you should be able to find at your local Asian market. If you can’t find that brand, any brand of rice noodles will work. Just make sure they’re the thin rice vermicelli noodles!

How Do I Julienne Carrots?

I’m sure professional chefs can julienne carrots in no time, but I don’t have that skill yet. That’s why I use a julienne peeler I found on Amazon! It is so quick and easy to use, and I recommend purchasing one!

[recipe title="Easy Vegan Pancit" servings="4" preptime="15 minutes" cooktime="15 minutes" ]
[recipe-notes]
Credit: My Auntie Fe, who shared her recipe with me.
[/recipe-notes]
[recipe-ingredients]

* 1 1/2 Tbsp oil

* 1 onion, thinly sliced

* 1 bell pepper, thinly sliced

* 3 carrots, julienned

* 1 1/2 cups broccoli

* 3 cloves garlic, minced

* 1/4 tsp ginger, minced

* 1 block tofu, cubed

* 1 package noodles (thin rice vermicelli)

* 3 cups water

* 1/2 cup oil

* Soy sauce, to taste (use tamari if gluten-free)

* Salt, pepper, MSG, to taste

[/recipe-ingredients]
[recipe-directions]

1. Add oil to frying pan and heat over medium heat. While oil is heating, soak noodles in hot water to soften them.

2. Once hot, add sliced onions and bell peppers.

3. When onions start becoming translucent, add julienned carrots.

4. When carrots begin to soften, add in minced garlic, minced ginger, and broccoli.

5. Once broccoli is bright green and getting softer, add in cubed tofu and season with pepper and soy sauce.

6. When tofu is warmed through, remove vegetables from pan and set aside.

7. Put frying pan back on heat and add in 3 cups water and 1/2 cup oil.

8. Bring to a boil and add noodles.

9. Stir until noodles have cooked through and no water remains.

10. Add vegetables and tofu to the noodles.

11. Season with soy sauce, salt, pepper, and MSG.

12. Enjoy!

[/recipe-directions]
[/recipe]

Taco Salad with Tortilla Chips

High Protein Taco Salad – Vegan

You have to try this high protein taco salad! A few weeks ago, I won a free Hodo Foods product and, when I saw the Adobo Mexican Crumbles, I knew I had to make this salad! It is delicious, fresh, and, best of all, high protein!

Do I Have to Use Avocado Dressing?

Not at all! You could use a salsa, make your own vegan chipotle ranch, or even try a zesty Italian dressing! I know, I know, who puts Italian dressing on a taco salad? But don’t knock it until you try it!

Recipe

[recipe title="High Protein, Vegan Taco Salad" servings="4" preptime="15 minutes" cooktime="0 minutes" ]
[recipe-ingredients]

* 1 head iceberg lettuce, chopped

* 1/2 cucumber, chopped

* 1 cup baby tomatoes, halved

* 1/2 red onion, finely diced

* 1 can black beans, rinsed and drained

* 1 can corn, rinsed and drained

* 1 package Hodo Foods Adobo Mexican Crumbles

* Choice of dressing, to taste

* Tortilla chips or strips, optional

[/recipe-ingredients]
[recipe-directions]

1. Add all ingredients to a large bowl.

2. Mix well.

3. Serve with tortilla chips or strips!

[/recipe-directions]
[recipe-nutrition]
Per Serving (without chips): 358 calories; 15 g fat; 43 g carbohydrates;
19 g protein.
*Macros will vary depending on dressing used.
[/recipe-nutrition]
[/recipe]

Japanese Curry served with rice

Easy Japanese Curry – Vegan, Gluten Free Option

May is Asian American and Pacific Islander Heritage Month in the United States, and I’m sharing my mom’s easy Japanese curry recipe! It is typically enjoyed with chicken or pork, but I have adapted it to be vegan by substituting tofu for the protein. This recipe traveled with my mom over the Pacific Ocean when she moved to the United States at age thirteen! Hope you enjoy!

Where Can I Buy Curry Cubes?

You can find curry cubes at your local Asian supermarket or on Amazon! I prefer the Extra Hot, but you can mix and match to your preferred level of spice!

Recipe

[recipe title="Vegan Japanese Curry" servings="10" preptime="20 minutes" cooktime="20-30 minutes" ]
[recipe-notes]
Credit: My mom, Aiya!
[/recipe-notes]
[recipe-ingredients]

* 20 ounces carrots, sliced

* 40 ounces potatoes, cubed

* 3 yellow onions, chopped

* 2 bell peppers, chopped

* 2 blocks firm tofu, cubed

* 15 ounces water

* 2 boxes S&B Golden Curry

* Soy sauce or coconut aminos for gluten free, to taste

[/recipe-ingredients]
[recipe-directions]

1. First, cut all of your vegetables and your tofu.

2. Add water to a large pot and add in all vegetables.

3. Bring to a boil.

4. Cover and simmer for 10-15 minutes, or until potatoes are cooked through. You should be able to easily insert a butter knife into the potatoes.

5. Add curry cubes to your pot.

6. Stir well, until curry cubes have “melted.” I start with a box and half and add more if needed. Curry should be thick, similar to gravy consistency.

7. Add tofu and allow to heat through.

8. Add soy sauce if needed.

9. Serve with rice and enjoy!

[/recipe-directions]
[recipe-nutrition]
Per Serving (without rice): 523 calories; 24 g fat; 56 g carbohydrates;
20 g protein.
[/recipe-nutrition]
[/recipe]